Table of Contents
- Why DIY Cat Toys? The Benefits of Crafting for Your Feline Friend
- Choosing Your Materials Wisely: Safety First!
- Essential Tools for Your Sewing Kit
- Project 1: The Classic Catnip Pouch (Beginner-Friendly)
- Project 2: The Mighty Cat Kicker Toy (For Active Play)
- Project 3: Fun-Shaped Toys (Fish, Mouse, Heart)
- Sewing Techniques for Success
- Safety First: Making Toys That Last and Protect
- Maximizing Playtime with Your Homemade Creations
- When to Buy (and Why Skimys Excels)
- Conclusion
- FAQ
Ever watched your cat pounce, chase, and bat at a toy with pure, unadulterated joy? It's one of the most heartwarming sights a cat parent can witness! That sparkle in their eye, the wiggle of their hips just before they spring – it’s pure feline magic. But what if you could multiply that joy by crafting a special toy with your own hands? Imagine the purrs of appreciation! Making your own cat toys isn't just a fun craft project; it's a way to personalize playtime, ensure material safety, and provide unique enrichment tailored to your beloved companion.
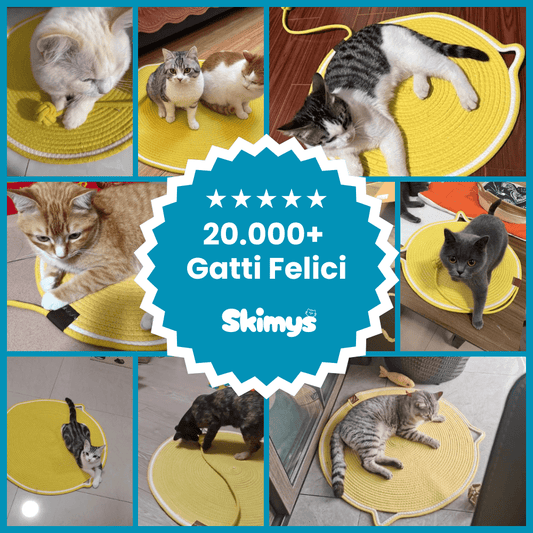
At Skimys, we believe life with pets should be easier, cleaner, and way more fun, and that includes the joy of DIY! While we pride ourselves on offering a curated collection of engaging, high-quality cat toys designed to stimulate natural instincts like hunting, pouncing, and chasing, we also love empowering cat parents with creative solutions. From interactive playthings to solo entertainment, our Cat Toys Collection offers durable, pet-tested materials that withstand daily play, bringing joy to both cats and their owners. But for those moments when you want to get crafty, this guide is your purr-fect starting point.
In this comprehensive guide, we’ll dive deep into the wonderful world of sewing cat toys. We'll explore why homemade toys are a fantastic option, what materials you’ll need, and walk you through several easy-to-follow projects suitable for various skill levels. We'll also cover essential safety tips and how to maximize playtime, ensuring your feline friend stays entertained, enriched, and absolutely adores their new handmade treasures. Get ready to unleash your inner crafter and create some truly special gifts for your cherished kitty!
Why DIY Cat Toys? The Benefits of Crafting for Your Feline Friend
There’s a unique satisfaction that comes from creating something with your own hands, and when that something brings joy to your cat, it’s even better! Crafting homemade cat toys offers a multitude of benefits that extend beyond just saving a few dollars.
First and foremost, personalization is key. Just like humans, every cat has their own personality and play style. Some prefer batting at small, lightweight toys, while others love to sink their claws into a substantial kicker toy. When you sew your own toys, you can customize the size, shape, texture, and even the scent (hello, catnip!) to perfectly match your cat’s preferences. This level of tailoring ensures the toy is truly engaging and stimulating for your specific feline.
Secondly, you gain complete control over materials. This is a significant advantage, especially for cats with sensitivities or those who tend to chew on their toys vigorously. By choosing your own fabrics, stuffing, and any added elements, you can avoid potentially harmful dyes, chemicals, or small parts that might come loose. For example, you can opt for natural, untreated cotton fabrics and chemical-free stuffing, giving you peace of mind that your cat is playing safely. This aligns perfectly with our commitment at Skimys to pet well-being, ensuring that every product, whether homemade or professionally designed, contributes positively to your cat's health and happiness.
Homemade toys are also a fantastic way to foster enrichment and reduce boredom. Cats are natural predators, and providing them with opportunities to "hunt" and "catch" toys is crucial for their mental and physical health. A unique, handmade toy can offer novel stimulation that keeps them engaged and active, helping to curb destructive behaviors that often stem from boredom. A cat parent working from home with a restless kitten, for instance, could keep them entertained with a rotation of homemade interactive toys, preventing them from trying to "hunt" the keyboard or furniture. While you’re crafting, remember that a varied environment is important. Give your cat the ultimate playground with our Cat Scratchers & Trees Collection. Perfect for climbing, scratching, and staying active indoors, these pieces complement any toy collection by providing essential vertical space and scratching outlets.
Finally, the act of making a toy can strengthen your bond. While your cat might not understand the concept of "handmade with love," the positive association they form with the toy, and the dedicated playtime that often accompanies its introduction, deepens your connection. It's a tangible expression of your care and attention, and the ensuing joyful play moments are priceless.
Choosing Your Materials Wisely: Safety First!
When making toys for your beloved feline, material selection isn't just about aesthetics; it's about safety and durability. Our mission at Skimys is to make life with pets easier, cleaner, and way more fun, and part of that is ensuring products are functional and safe. The same principles apply to your DIY creations.
Fabric Selection
- Natural Fibers are Best: Opt for natural fabrics like 100% cotton, linen, or felt made from natural wool. These are generally safer than synthetic materials, especially if your cat tends to mouth or chew on their toys. Look for untreated fabrics, as water-repellent or stain-resistant finishes can contain chemicals that may be harmful. Old, clean cotton t-shirts, flannel sheets, or denim scraps make excellent choices.
- Avoid Loose Weaves or Fringes: Fabrics that fray easily or have loose threads can pose a choking hazard or cause intestinal blockages if ingested. Similarly, avoid adding any small, detachable embellishments like buttons, beads, or plastic eyes unless they are extremely securely sewn and too large for your cat to swallow.
- Texture Variety: While safety is paramount, don't forget texture! Cats love variety. A soft flannel might be great for cuddling, while a sturdier canvas could be fun for a kicker toy.
Stuffing Options
- Poly-fill (Polyester Fiberfill): This is a common and safe choice, readily available in craft stores. It's soft, washable, and holds its shape well.
- Fabric Scraps: A fantastic way to repurpose! Small, clean scraps of cotton or felt can make excellent, eco-friendly stuffing. Just make sure they're cut into small, non-stringy pieces.
- Natural Wool or Cotton Batting: If you prefer natural options, these can work well. Ensure they are clean and free of any chemical treatments.
- Avoid: Don't use foam rubber (can break into small pieces and be ingested) or cedar chips (essential oils can be irritating to cats).
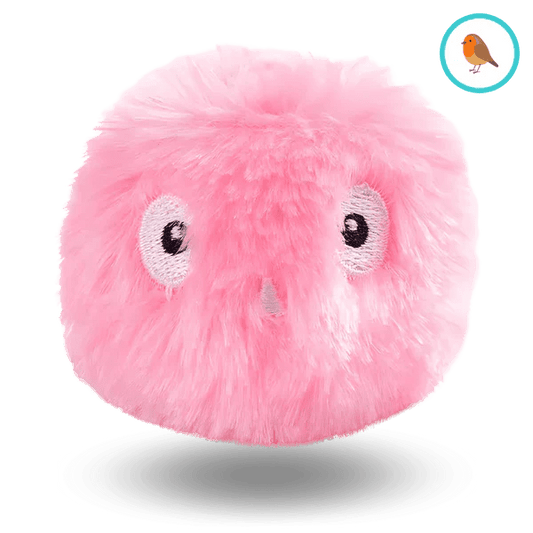
The Magic of Catnip (and Alternatives)
Catnip (Nepeta cataria) is a classic for a reason – many cats go wild for it!
- Fresh vs. Dried: Dried catnip is easiest to use in toys. Fresh catnip can also be sewn into a toy, but it will lose its potency as it dries.
- Potency: Catnip potency can vary. Store it in an airtight container in a cool, dark place, or even the freezer, to maintain its freshness.
- Not All Cats React: About 70-80% of cats are genetically predisposed to respond to catnip. If your cat isn't one of them, don't worry! There are alternatives.
-
Alternatives:
- Silvervine (Actinidia polygama): A highly effective alternative for many cats who don't react to catnip, often inducing similar euphoric effects.
- Valerian Root (Valeriana officinalis): Another herb that can elicit a positive, playful response in some felines.
- Honeysuckle (Lonicera tatarica): The wood of the Tartarian honeysuckle plant can also be a stimulant for cats, though it's less common to use in sewn toys.
Optional Additions (with Extreme Caution!)
- Crinkle Material: For an irresistible sound, you can carefully sew in a small piece of crinkle paper (the type found in baby toys, which is typically safe and durable) or even a clean, crinkly snack bag. Ensure it's fully enclosed and cannot be accessed by your cat.
- Jingle Bells: We strongly advise against using bells or any small, hard inserts unless they are absolutely and permanently encased within layers of fabric and stuffing, making it impossible for them to ever come loose. If there's any doubt, skip the bells entirely. A loose bell can be a choking hazard or cause internal injury. Our commitment to quality and attention to detail means we prioritize pet safety above all else, and we encourage you to do the same in your DIY endeavors.
Essential Tools for Your Sewing Kit
Before we dive into the fun projects, let's ensure your sewing kit is stocked and ready for action. You don't need fancy equipment to sew cat toys; many of these projects can be done entirely by hand!
- Fabric Scissors: Sharp scissors specifically for fabric will make cutting clean lines much easier. Avoid using them on paper, as this dulls the blades quickly.
- Pins: Essential for holding fabric pieces together while you sew, ensuring your seams are straight and neat.
- Hand Sewing Needles: An assorted pack will give you various sizes. Choose one appropriate for your fabric – a stronger needle for thicker fabrics.
- Thread: Strong, durable polyester thread is generally recommended. It's less likely to break than cotton thread, especially with energetic play. Match the thread color to your fabric for a neater finish, or choose a contrasting color for a fun design element.
- Ruler or Measuring Tape: For accurate measuring and cutting of fabric pieces.
- Fabric Marker or Chalk: To draw your template outlines onto the fabric. Disappearing ink fabric pens are great, or simple tailor's chalk.
- Seam Ripper (Optional but Recommended): Every sewer makes mistakes! A seam ripper makes quick work of undoing stitches without damaging your fabric.
- Iron and Ironing Board (Optional): Pressing seams can give your finished toy a more professional look, though it's not strictly necessary for cat toys.
- Sewing Machine (Optional): While all these projects can be hand-sewn, a sewing machine will make the process faster and create stronger seams.
Project 1: The Classic Catnip Pouch (Beginner-Friendly)
This is the simplest cat toy to make, perfect for beginners, and a guaranteed hit with most felines! It's essentially a small, soft pillow stuffed with irresistible goodness.
What You'll Need:
- Scrap fabric (e.g., cotton, flannel, felt) – about 8x16 inches (or 20x40 cm)
- Stuffing (poly-fill or fabric scraps)
- Dried catnip or preferred alternative
- Basic sewing kit: scissors, pins, needle, thread, ruler, fabric marker
Step-by-Step Instructions:
-
Create Your Template & Cut Fabric:
- Using your ruler and fabric marker, draw a rectangle on a piece of paper or cardboard that measures 4 inches x 8 inches (or 10 cm x 20 cm). This will be your template. You can adjust the size; a kitten might prefer something smaller, while a larger cat might enjoy a more substantial pouch. The key is that the rectangle should be twice as long as it is wide, so it can be folded into a square.
- Place your template on your chosen fabric and draw around it.
- Cut out the fabric rectangle.
-
Fold and Pin:
- Fold your fabric rectangle in half lengthwise, right sides together (meaning the side you want to be visible on the finished toy is on the inside). This will create a square shape.
- Pin along two of the open edges, leaving one short side completely open.
-
Sew the Sides:
- Using a simple running stitch (for hand sewing) or a straight stitch (for machine sewing), sew along the two pinned edges. Remember to leave a 1/4 to 1/2 inch (0.5 to 1 cm) seam allowance. If using a machine, backstitch at the beginning and end of each seam for extra security.
-
Turn Right Side Out:
- Carefully snip the corners of the sewn edges (don't cut through your stitches!), then turn the fabric right side out through the unsewn opening. Use a blunt object like a chopstick or the end of a pen to gently push out the corners, making them crisp.
-
Stuff and Add Catnip:
- Now comes the fun part! Begin stuffing your pouch with poly-fill or fabric scraps. As you add stuffing, sprinkle in your dried catnip or chosen alternative. Layering it throughout the stuffing ensures the scent is well distributed. Fill it until the pouch is firm but still a little squishy – about the density of a beanbag.
-
Close the Opening:
- Fold in the raw edges of the opening about 1/4 inch (0.5 cm) and pin them neatly.
- Using an "invisible stitch" (also known as a ladder stitch – see the "Sewing Techniques" section for guidance) or a very neat whipstitch, hand-sew the opening closed. This creates a seamless, durable finish. Your cat won't mind if it's not perfect, but a secure closure is important for safety!
Congratulations! You've made your first homemade cat toy. Watch your cat enjoy their new, personalized plaything!
Project 2: The Mighty Cat Kicker Toy (For Active Play)
If your cat loves to wrestle, bunny-kick, and grab toys with their front paws while attacking with their hind legs, a kicker toy is an absolute must-have! These elongated pillows are designed to withstand some serious feline combat.
What You'll Need:
- Durable fabric (e.g., canvas, denim, sturdy cotton) – about 16x10 inches (or 40x25 cm)
- Plenty of stuffing (poly-fill or fabric scraps)
- Dried catnip or alternative (optional, but highly recommended for kickers!)
- Basic sewing kit: scissors, pins, needle, thread, ruler, fabric marker
- Sewing machine is recommended for stronger seams on kicker toys, but hand-sewing is possible.
Step-by-Step Instructions:
-
Measure and Cut Fabric:
- Decide on your desired kicker toy size. A good starting point is a rectangle of fabric measuring approximately 15-16 inches (38-40 cm) long by 8-10 inches (20-25 cm) wide. This size allows for good kicking action.
- Cut one piece of fabric to these dimensions.
-
Fold and Sew (Right Sides Together):
- Fold your fabric rectangle in half lengthwise, right sides together. This will create a long, narrow strip.
- Pin along the long open edge and one of the short open edges.
- Sew these two pinned edges, leaving about a 1/2 inch (1.25 cm) seam allowance. Make sure to backstitch at the beginning and end of your seams, especially for a kicker toy that will endure rough play.
- Leave one short end completely open for turning and stuffing.
-
Turn Right Side Out:
- Carefully snip the corners of the sewn end.
- Reach inside the tube of fabric and pull it right side out through the unsewn opening. Use a blunt object to push out the corners, creating a neat end.
-
Stuff with Catnip and Filling:
- Begin filling the kicker toy with stuffing. The key here is to make it firm. A flimsy kicker toy won't offer the same satisfying resistance.
- As you stuff, generously sprinkle in your catnip. Layer it throughout to ensure the scent is present from end to end. You might be surprised at how much stuffing a kicker toy can take! Keep pushing and packing until it's dense and firm.
- Be warned: as the catnip scent starts to waft, you might attract some curious furry "helpers" to your crafting table!
-
Close the Opening:
- Once your kicker toy is firmly stuffed, fold in the raw edges of the opening about 1/2 inch (1.25 cm). Pin neatly.
- Again, use an invisible stitch (ladder stitch) to hand-sew the opening securely closed. For kicker toys, a strong, neat closure is paramount, as this area will take a lot of abuse! If you're using a machine, you could carefully topstitch this opening closed, but hand-sewing often provides a cleaner finish for this particular step.
Now you have a sturdy, stimulating kicker toy ready for your cat's most enthusiastic wrestling moves!
Project 3: Fun-Shaped Toys (Fish, Mouse, Heart)
For those who want to add a bit more flair to their cat's toy collection, shaped toys are a wonderful option. These can be slightly more challenging due to curves but are incredibly rewarding.
What You'll Need:
- Scrap fabric (e.g., cotton, felt, flannel)
- Stuffing
- Dried catnip or alternative
- Basic sewing kit
- Paper/cardboard for templates
Step-by-Step Instructions (General for Shapes):
-
Create Your Shape Template:
- Draw your desired shape on paper or cardboard – a simple fish, a cartoon mouse, or a heart are popular choices. Ensure the shape isn't too intricate, especially for your first attempt. Make it small enough for your cat to bat around, but large enough not to be a choking hazard. A good size might be 3-5 inches (7.5-12.5 cm) at its longest point.
- Cut out your paper template.
-
Cut Fabric Pieces:
- Place your template on your chosen fabric and trace around it. You will need two identical pieces of fabric for each toy.
- Cut out both fabric pieces.
-
Sew Together (Right Sides Together):
- Place the two fabric pieces right sides together, aligning all edges. Pin them securely around the perimeter.
- Using a running stitch (hand) or straight stitch (machine), sew around the edge of your shape, leaving a 1/4 inch (0.5 cm) seam allowance.
- CRITICAL: Remember to leave a 1-2 inch (2.5-5 cm) opening on a relatively straight part of the shape (e.g., the side of a fish, the bottom of a heart) for turning and stuffing. Backstitch at the beginning and end of your sewing, and around the opening, to secure the stitches.
-
Clip Curves and Notches:
- This step is essential for shaped toys. To get smooth curves when turned right side out, you need to "clip" the seam allowance.
- For outward curves (like the back of a fish or the top of a heart), make small V-shaped notches into the seam allowance, careful not to cut through your stitching.
- For inward curves (like the area between a fish's tail or the dip of a heart), make small slits into the seam allowance, again, without cutting your stitches.
-
Turn Right Side Out:
- Carefully turn the toy right side out through the opening. Use a blunt tool (like a pen cap or chopstick) to gently push out all the curves and corners, shaping the toy nicely.
-
Stuff and Add Catnip:
- Stuff your toy firmly but gently, ensuring all areas of the shape are filled. Sprinkle in catnip as you go. For smaller shapes, use smaller pieces of stuffing.
-
Close the Opening:
- Fold in the raw edges of the opening and secure it with an invisible stitch (ladder stitch).
These fun-shaped toys provide a lovely aesthetic and an engaging play experience for your cat!
Sewing Techniques for Success
Mastering a few basic sewing techniques will elevate your homemade cat toys from good to purr-fect.
Hand Sewing vs. Machine Sewing
- Hand Sewing: Great for small projects, quick repairs, and for those without a machine. It offers precision and control. For cat toys, a simple running stitch for seams and a ladder stitch for closures are usually sufficient.
- Machine Sewing: Faster and creates stronger, more consistent seams. Ideal if you plan to make many toys or for items like kicker toys that need extra durability. A basic straight stitch is all you need.
Seam Allowances, Turning, and Clipping Curves
- Seam Allowance: This is the distance between the raw edge of your fabric and your line of stitching. A consistent seam allowance (e.g., 1/4 inch or 1/2 inch) ensures your toy comes out the size and shape you intended.
- Turning Right Side Out: Always remember to turn your fabric right side out before stuffing and closing the final opening.
- Clipping & Notching Curves: As mentioned in Project 3, this is crucial for smooth curves. Clipping (cutting V-shapes) on outward curves removes bulk, while notching (cutting slits) on inward curves allows the fabric to spread, preventing puckering.
The Invisible Stitch (Ladder Stitch)
This stitch is your secret weapon for neat, strong closures. It's called "invisible" because the stitches are hidden within the fold of the fabric.
- Prepare the Opening: Fold in the raw edges of your opening and press or pin them neatly.
- Start: Knot your thread and bring your needle up from the inside of one folded edge, so the knot is hidden.
- First "Rung": Take a small stitch (about 1/8 to 1/4 inch) horizontally along the folded edge directly opposite where your thread emerged.
- Second "Rung": Bring your needle out, then take another small horizontal stitch along the first folded edge, directly opposite your last stitch.
- Repeat: Continue alternating between the two folded edges, creating a "ladder" effect. Keep your stitches small and even.
- Pull Tight: Every few stitches, gently pull your thread taut. You'll see the "ladder" disappear as the folded edges draw together, creating an almost invisible seam.
- Finish: When you reach the end, make a secure knot and bury the tail of the thread inside the toy.
This stitch is perfect for closing stuffed toys and ensures a tidy, durable finish that won't easily unravel, even with a cat's enthusiastic play.
Safety First: Making Toys That Last and Protect
Our commitment to pet well-being, quality, and attention to detail at Skimys extends to all aspects of pet care, including DIY. While homemade toys offer incredible personalization, safety must always be your top priority.
- Durability is Key: Cats are powerful players! Ensure all seams are strong and secure. Double stitching, especially on kicker toys, can add an extra layer of protection against rips and tears. If you're hand-sewing, make your stitches small and tight.
- Size Matters: The toy should be large enough that your cat cannot accidentally swallow it, but small enough for them to comfortably bat, carry, or kick. Avoid very tiny toys unless they are part of a larger, securely attached structure.
- No Small Detachable Parts: This is paramount. Buttons, beads, bells (unless absolutely secured as discussed earlier), plastic eyes, loose ribbons, or long strings can be serious choking hazards or cause internal obstructions if ingested. When in doubt, leave it out. A cat's natural curiosity can lead them to explore, and unfortunately, ingest, things they shouldn't.
- Inspect Regularly: Even the most well-made toys can eventually show wear and tear. Make it a habit to regularly inspect all your cat’s toys, both homemade and store-bought, for loose threads, tears, or exposed stuffing. If a toy is damaged, repair it immediately or, if it's beyond repair, discard it.
- Supervised Play: Always supervise your cat, especially with new toys or if your cat is known to be a "toy destroyer." This allows you to intervene if any parts come loose or if your cat tries to eat something they shouldn't.
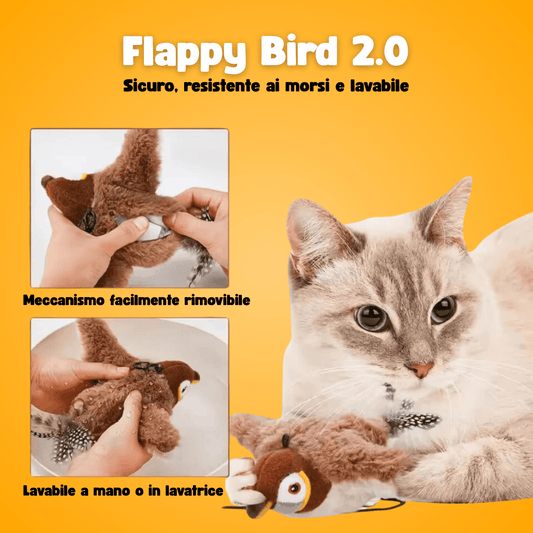
- Washability: Consider how easy your toy will be to clean. Natural fabrics and poly-fill generally hold up well to machine washing (use a gentle cycle and air dry) or hand washing, which is important for hygiene.
By following these safety guidelines, you can ensure that your handmade gifts bring only joy and safe play to your feline companion.
Maximizing Playtime with Your Homemade Creations
You've put love and effort into sewing these fantastic toys – now let's make sure your cat gets the most out of them!
- Toy Rotation: Don't put all your new toys out at once! Cats can get bored with the same old things. Introduce one or two new handmade toys at a time, and rotate them every few days or weeks. Keep the "retired" toys in an airtight container with a bit of fresh catnip to re-infuse them with scent. This keeps playtime fresh and exciting, making each toy feel new again.
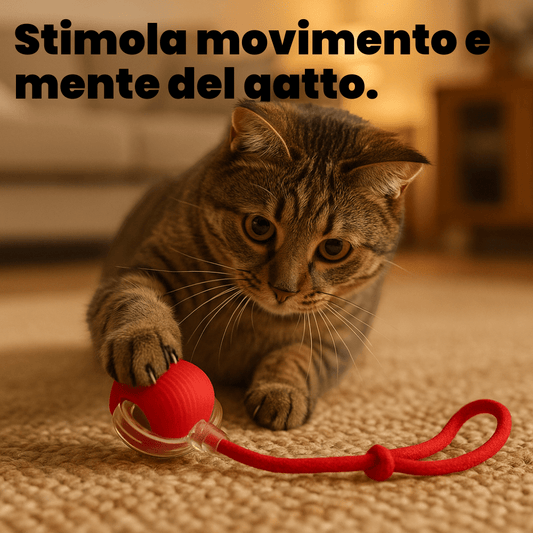
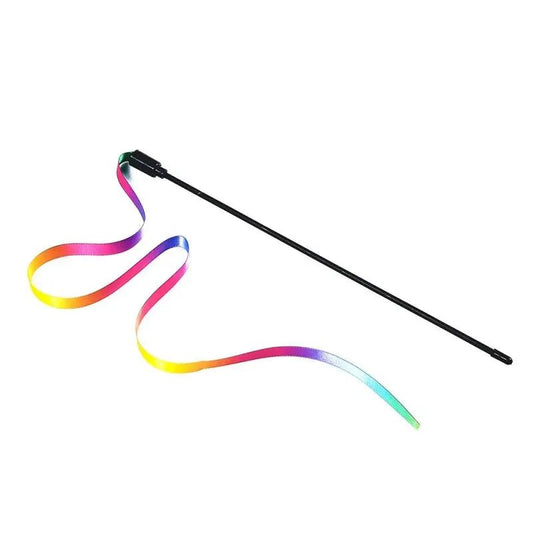
- Interactive Play: While solo play is great, some of the best bonding moments come from interactive play. Use your new handmade toys (especially smaller, bat-able ones) to engage your cat in a game of "hunt and pounce." Drag them across the floor, hide them, or toss them gently. This mimics natural hunting behavior and provides excellent exercise and mental stimulation.
- Pair with Other Enrichment: Remember that toys are just one piece of the enrichment puzzle. For a truly happy and healthy cat, combine toy play with other stimulating activities. This might include regular grooming, which is also a fantastic bonding activity. Keep your cat’s coat shiny and healthy with tools from our Cat Brushes & Grooming Collection. Grooming doesn’t just improve appearance—it strengthens your bond too! Also consider vertical spaces from our Cat Scratchers & Trees Collection for climbing and observation, or puzzle feeders to challenge their minds.
- Observe and Learn: Pay attention to how your cat interacts with different toys. Do they prefer small and squishy, or long and firm? Do they like toys that crinkle, or those infused with silvervine? Your cat's preferences will guide your future DIY projects and help you select the perfect companions from our curated Cat Toys Collection.
When to Buy (and Why Skimys Excels)
While we absolutely love encouraging your creative spirit through DIY projects, we also recognize that sometimes, life gets busy, or you simply want the convenience and guaranteed quality of expertly designed products. That's where Skimys comes in.
At Skimys, our mission is to make life with pets easier, cleaner, and way more fun. We believe in offering products that are functional, durable, design-forward, and joyful, while avoiding overpriced or boring options. Every product we offer, from our engaging toys to our cozy beds, is tested by our own pets, ensuring real-world usability and cat-approved durability.
Think of it this way: homemade toys are wonderful for personalization and a creative outlet. But our Cat Toys Collection provides:
- Professional Durability: We use high-quality, long-lasting materials designed to withstand enthusiastic play.
- Innovative Design: Our toys are thoughtfully crafted to tap into a cat's natural instincts, offering a range of textures, movements, and enrichment opportunities.
- Safety Assurance: You can trust that our products are made with your cat's safety in mind, rigorously tested to meet our high standards.
- Convenience: Get instant access to a variety of engaging options without needing to gather materials or dedicate sewing time.
- Stylish Integration: Our products are designed to complement your home, proving that pet essentials can be both functional and beautiful.
So, whether you're crafting a new treasure for your cat or looking for a stylish, durable addition to their play space, remember that we're here to support your cat's well-being and provide solutions that make your shared life more joyful. After an active play session, every cat deserves a comfortable spot to rest and recharge. Give your feline the comfort they deserve—browse our Cat Beds & Furniture Collection to find the perfect spot for lounging, napping, and recharging. It's the perfect complement to a life filled with play!
Conclusion
Embarking on the journey of sewing your own cat toys is a deeply rewarding experience, offering a unique blend of creativity, personalization, and profound connection with your feline companion. We've explored everything from selecting safe materials and mastering basic stitches to crafting simple pouches, robust kicker toys, and charming shaped creations. The joy your cat derives from a toy made with your own hands is truly immeasurable, fostering enrichment, reducing boredom, and encouraging their natural instincts in a way that’s uniquely tailored to them.
Remember, the goal isn't perfection, but participation. Your cat won't critique your stitches; they'll simply revel in the new object of their affection, enjoying the scent of catnip and the thrill of the chase. By embracing DIY, you gain control over materials, ensuring safety and durability, and you deepen the bond you share with your beloved pet.
Whether you're crafting a new treasure or seeking out innovative, high-quality products, our mission at Skimys is to make life with your pets easier, cleaner, and way more fun. We stand by our commitment to pet well-being, offering products that are not just functional and durable, but also design-forward and joyful.
So, roll up your sleeves, gather your materials, and get ready to create something wonderful for your furry friend. And when you're ready to expand your cat's horizon with expertly designed, pet-tested options, we invite you to explore our carefully curated selection. Ready to treat your cat to something new and exciting? Make every day fun for your feline—shop our Cat Toys Collection now and discover playtime favorites that bring endless joy!
FAQ
Q1: What are the safest fabrics to use for homemade cat toys? A1: The safest fabrics are natural, untreated fibers like 100% cotton, flannel, or felt made from natural wool. Avoid synthetic fabrics, those with chemical finishes (like stain-resistant treatments), or fabrics that fray easily, as these can pose health risks or choking hazards.
Q2: Is catnip always necessary for a successful cat toy? A2: No, catnip is not always necessary. While many cats react positively to catnip, about 20-30% are not genetically sensitive to it. For these cats, or if you prefer alternatives, consider using silvervine, valerian root, or honeysuckle. The most important thing is that the toy is engaging in terms of shape, texture, and encourages natural play behaviors.
Q3: Can I add bells or other noisy items to my sewn cat toys? A3: We strongly advise against adding bells or any small, hard inserts unless they can be absolutely and permanently encased within layers of fabric and stuffing, making it impossible for them to ever come loose. Loose bells or small parts are serious choking hazards and can cause internal injuries if ingested. When in doubt, it's always safest to omit them.
Q4: How often should I replace or clean homemade cat toys? A4: You should regularly inspect all cat toys, homemade or otherwise, for wear and tear such as loose threads, tears, or exposed stuffing. If a toy is damaged beyond safe repair, discard it. For cleaning, most fabric toys can be gently hand-washed or machine-washed on a delicate cycle with a pet-safe detergent, then air-dried. Regular cleaning helps maintain hygiene and removes odors.
Q5: My cat isn't playing with the toy I made. What should I do? A5: Don't be discouraged! Cats have individual preferences. Try rotating toys, introducing it during a playful mood, or infusing it with a different attractant like silvervine. Observe your cat's play style – do they prefer small toys to bat, or larger ones to kick? Is the texture right? Sometimes, a toy just isn't a hit, and that's okay. Consider trying a different shape or material for your next project, or explore our curated Cat Toys Collection for professionally designed options that cater to a wide range of feline preferences.