Table of Contents
- Introduction
- Why Go DIY? The Benefits of Crafting Your Cat's Toys
- Safety First: Essential Considerations Before You Start
- Gathering Your Supplies: What You'll Need
- Choosing Your Pattern & Template: The Blueprint for Your Mouse
- Step-by-Step Sewing Tutorial: Crafting Your Mouse
- Tips for Success & Durability
- Beyond the Mouse: Why Play is Essential for Feline Well-being
- Conclusion
- FAQ Section
Introduction
Ever watch your cat bat at a store-bought toy for precisely two minutes before losing interest, or worse, tearing it to shreds in a day? We know the feeling! It's frustrating to invest in something your feline friend barely acknowledges, or that simply doesn't stand up to their playful antics. The truth is, while we offer a fantastic selection of durable, design-forward, and joyful toys here at Skimys, sometimes the most cherished treasures are the ones made with love right at home. Crafting your own cat toys isn't just a fun, creative endeavor; it’s a wonderful way to offer your cat something truly unique, tailored to their preferences, and built with your own two hands. Plus, it’s incredibly satisfying to see your cat pounce on a toy you’ve created!
In this comprehensive guide, we'll walk you through exactly how to sew a mouse cat toy – a timeless classic that appeals to every cat’s natural hunting instincts. We'll cover everything from gathering the right materials and ensuring safety, to a step-by-step sewing tutorial that anyone can follow, whether you're a seasoned crafter or just picking up a needle for the first time. We believe that life with pets should be easier, cleaner, and way more fun, and that includes the joy of DIY projects that enrich your cat's life. By the end of this post, you'll be equipped with the knowledge and confidence to create a charming, cat-approved mouse toy that provides endless entertainment and strengthens the bond you share. Ready to treat your cat to something new and exciting? Explore our Cat Toys Collection for even more inspiration and pre-made playtime favorites that complement your DIY efforts!
Why Go DIY? The Benefits of Crafting Your Cat's Toys
You might be wondering, "Why bother making a toy when there are so many great options available?" It's a valid question! Here at Skimys, we pour our hearts into designing and curating exceptional products that we know cats (and their humans!) will love. Every single item in our collection is tested by our own pets, ensuring real-world usability and cat-approved durability. However, there's a special magic in making something yourself, and it comes with a unique set of benefits:
- Personalization & Tailored Appeal: Does your cat love crinkly sounds? Are they obsessed with a specific texture? When you make your own toy, you're in control. You can choose materials, sizes, and internal fillers that you know will entice your specific feline companion. This level of customization is hard to achieve with mass-produced items.
- Cost-Effectiveness: Crafting a mouse cat toy often means utilizing materials you already have around the house—old t-shirts, fabric scraps, even discarded bits of twine. This can significantly cut down on expenses, especially if your cat goes through toys quickly. It's a fantastic way to offer enrichment without breaking the bank.
- Material Control & Safety: When you're the creator, you know exactly what goes into the toy. This is crucial for cats with sensitivities or those who tend to ingest parts of their toys. You can select natural, non-toxic fabrics and stuffing, avoiding chemicals or small, easily detached parts that could pose a choking hazard. This aligns perfectly with our commitment to pet well-being.
- Reduced Waste & Upcycling: Giving new life to old clothing or fabric scraps is an environmentally friendly practice. Instead of tossing that worn-out denim or faded flannel shirt, transform it into a beloved plaything for your pet.
- The Joy of Creation & Bonding: There's a real sense of accomplishment in crafting something with your own hands, especially when it brings joy to your pet. Watching your cat enthusiastically play with a toy you made fosters a deeper connection and provides a delightful shared experience. It embodies our mission to make life with pets more fun!
Safety First: Essential Considerations Before You Start
Before we dive into the creative process, let's talk about safety. Your cat's well-being is always our top priority at Skimys, and this extends to any DIY project.
Choosing Safe Materials
- Fabric: Opt for natural, durable, and non-toxic fabrics. Felt (wool or wool blend is ideal), fleece, sturdy cotton, denim from old jeans, or even old t-shirts work wonderfully. Avoid anything that frays excessively or contains loose threads that could be ingested. Brightly dyed fabrics should be colorfast to prevent staining or irritation if licked.
- Stuffing: Polyester fiberfill is a common and safe choice. Alternatively, you can use fabric scraps cut into small pieces. If you're adding catnip, ensure it's high-quality, dried catnip. For added interest, a small amount of crinkly cellophane (from food packaging, thoroughly cleaned) can be safely sewn inside. Avoid tiny bells that could break free or be swallowed. If you use a bell, make sure it's large, securely encased, and designed specifically for pets, or consider omitting it entirely for maximum safety.
- Tail Material: A sturdy piece of natural twine, thin rope, or thick ribbon can work. However, inspect it carefully. If it frays easily or if your cat tends to chew and ingest string-like items, it's best to use a fabric tail sewn directly into the mouse or avoid a tail altogether. We want to prevent any entanglement or ingestion risks.
Avoiding Choking Hazards & Ingestion Risks
- Small Parts: Never use small, detachable embellishments like plastic eyes, beads, or buttons. These are significant choking hazards. If you want to add eyes or a nose, embroider them directly onto the fabric with sturdy thread.
- Secure Stitching: This is paramount. All seams must be strong and secure to prevent stuffing or internal components from escaping. Double-stitching or using a backstitch can add extra durability.
- Supervision: Just like with any new toy, whether store-bought or handmade, always supervise your cat during playtime, especially initially. Watch for any signs of wear and tear. If a toy starts to come apart, remove it immediately to prevent your cat from ingesting loose pieces.
- Regular Inspection: Make it a habit to regularly inspect all your cat's toys for damage. Worn or torn toys should be repaired or discarded.
By keeping these safety guidelines in mind, you can create a fun and safe toy that your cat will adore, without worry.
Gathering Your Supplies: What You'll Need
Having all your materials ready before you begin will make the sewing process smooth and enjoyable. Here’s a detailed list of what you’ll likely need:
-
Fabric:
- Wool felt or wool-blend felt: Durable, doesn't fray easily, and cats love the texture. You'll need a piece large enough for two side pieces, one bottom, and two ears (e.g., an 8x10 inch piece will likely suffice for one mouse).
- Alternatively: Sturdy cotton fabric scraps, fleece, denim from old jeans, or an old t-shirt (ensure it’s clean and doesn’t have any lingering detergent smells that might deter your cat).
-
Stuffing:
- Polyester fiberfill: Standard stuffing for plush toys.
- Optional additions: Dried catnip (about 1-2 teaspoons), crinkly material (e.g., a small, clean piece of cellophane from a cereal bag), or small fabric scraps.
-
Tail Material:
- Strong twine or thin rope (e.g., sisal, cotton rope).
- Thick ribbon (about 4-6 inches long).
- Self-fabric tail: Consider cutting a thin strip of your chosen fabric for an even safer, integrated tail.
-
Sewing Essentials:
- Scissors: A sharp pair for fabric (and ideally a separate pair for paper).
- Needle: A hand-sewing needle.
- Thread: Strong embroidery floss (using 3 strands for durability is often recommended) or sturdy polyester all-purpose thread that matches or complements your fabric color.
- Pins or sewing clips: To hold fabric pieces together.
- Fabric marker or tailor's chalk: For tracing your pattern.
-
Pattern & Tools:
- Paper and pencil: For drawing your own template or printing one.
- Printer (if using a downloadable pattern).
-
Optional but Recommended:
- Thimble: To protect your finger while pushing the needle.
- Fabric glue or fray check: To secure ribbon ends for the tail (if using ribbon) or reinforce tricky spots.
- A pencil or chopstick: Helpful for turning small pieces right-side-out and pushing stuffing into tight spots like the nose.
Having these items laid out will prepare you for a successful crafting session.
Choosing Your Pattern & Template: The Blueprint for Your Mouse
The shape of your mouse is key to its appeal. Cats are drawn to erratic movements, and a well-proportioned mouse shape can tumble and dart in ways that mimic real prey.
Drawing Your Own Template
If you're confident in your drawing skills, creating your own template allows for maximum customization. A basic mouse toy typically consists of three main pattern pieces:
- Side Body Piece (x2): This is the main profile of the mouse. Imagine a plump teardrop shape, with a slightly pointed nose and a wider, rounded back. The bottom edge should be relatively straight where it will attach to the base.
- Bottom Body Piece (x1): This piece forms the underside of the mouse. It will be shaped like a wider, flatter teardrop or an oval, matching the length and general curvature of the side body pieces' lower edges.
- Ear Pieces (x2): Small, rounded or slightly pointed semicircles or teardrops.
Tips for Drawing:
- Start by sketching one side body piece. Once you're happy with it, fold your paper in half, trace it onto the other side, and cut both layers simultaneously to ensure two identical side pieces.
- For the bottom piece, measure the length of the straight bottom edge of your side piece and draw an oval or teardrop that matches this length. You'll need to trim and adjust as you sew, so don't worry about perfection just yet.
- Think about the finished size. A typical mouse toy is about 3-5 inches long, perfect for batting and carrying.
Using a Downloadable Pattern
If drawing isn't your strong suit (and let's be honest, freehand templates can be tricky!), using a pre-made, downloadable pattern is a fantastic option. Many crafting sites offer free printable patterns. Just remember to:
- Print at 100% scale: Look for a 1-inch gauge box on the pattern to ensure it prints correctly.
- Cut out the paper pieces precisely: This will make cutting your fabric much easier and more accurate.
Once you have your template pieces (whether drawn or printed), you're ready to move on to the fabric. Place your paper patterns onto your chosen fabric, pin them down, and carefully trace around them with your fabric marker or chalk. Remember to cut:
- Two mirror-image side body pieces (if your fabric has a right/wrong side).
- One bottom body piece.
- Two ear pieces.
- A small piece for the tail, if not using twine or ribbon.
Precision in cutting will lead to a neater finished mouse! Now, let’s get sewing!
Step-by-Step Sewing Tutorial: Crafting Your Mouse
This tutorial assumes basic hand-sewing knowledge. We'll use a strong running stitch or backstitch for durability. Take your time, and enjoy the process!
Step 1: Cutting Your Fabric Pieces
Using your chosen pattern, carefully cut out all your fabric pieces:
- Two side pieces (ensure they are mirror images if your fabric has a distinct "right" side).
- One bottom piece.
- Two ear pieces.
- One tail piece (if using fabric, otherwise have your twine/ribbon ready).
Step 2: Attaching the Ears
This step is easier to do before the mouse body is fully assembled.
- Take one ear piece and fold its narrow end in half slightly.
- Place this folded ear onto the pointed "nose" end of one side body piece, ensuring it's positioned where an ear would naturally be. Aim for about half an inch back from the very tip of the nose.
- Using your needle and thread (3 strands of embroidery floss are excellent here), secure the folded ear to the side piece with a few small, neat stitches. A simple vertical stitch across the fold works well.
- Repeat for the second ear on the other side body piece, making sure the ears are symmetrical.
Step 3: Sewing the Side Body Pieces Together
Now we'll form the main body of the mouse.
- Place the two side body pieces together. If your fabric has a "right" side (the side you want to show), place them with the right sides facing inwards. If using felt (which often looks the same on both sides), simply place them together.
- Pin the two side pieces together along the curved top edge, starting from the nose and going all the way to the back. Leave the flat bottom edge unsewn for now.
- Using your sturdy thread, begin sewing from the nose, around the curve, and down to the back. A backstitch will create a very strong seam, or you can use a close running stitch and then go back over it to fill in the gaps for added strength. Keep your stitches about 1/8 to 1/4 inch from the edge.
- Once you've sewn the curved top, tie off your thread securely.
Step 4: Attaching the Bottom Piece
This step requires a little precision.
- Take your assembled side pieces (which now form a curved "tunnel") and the bottom piece.
- If your fabric has a "right" side, make sure the "right" side of the bottom piece is facing inwards (against the "right" sides of the side pieces).
- Align the pointed end of the bottom piece with the nose of your mouse. Pin it in place.
- Work your way around, pinning the edges of the bottom piece to the unsewn edges of the side pieces. You might need to gently stretch or ease the fabric slightly to make it fit.
- Crucially, leave a gap of about 1-2 inches open at the wide "back" end of the mouse. This opening is where you’ll turn the toy right-side-out and add the stuffing.
- Sew the bottom piece to the side pieces with strong stitches, going around the perimeter, remembering to leave that gap.
Step 5: Turning Right-Side-Out
- Through the opening you left at the back, carefully push all the fabric through until the mouse is right-side-out.
- Use a pencil or chopstick to gently push out the nose and any curves to get a nice, smooth shape. Be gentle so you don't stress your freshly sewn seams.
Step 6: Stuffing Your Mouse and Adding Catnip
Now for the fun part that makes the mouse plump and inviting!
- Begin filling your mouse with polyester fiberfill or fabric scraps. Use your pencil or chopstick to push stuffing firmly into the nose and ears first, ensuring they hold their shape.
- Once the mouse is about half full, if you're using catnip, add about 1-2 teaspoons of dried catnip into the middle of the stuffing. You can also add a small piece of crinkly cellophane for sound.
- Continue stuffing until your mouse is firm but not overly rigid – you want it to be squishy enough for your cat to bite and carry. Overstuffing can put stress on seams.
Step 7: Inserting the Tail and Closing the Opening
This is where the mouse gets its signature look.
- Take your tail material (twine, ribbon, or fabric strip). If using ribbon or twine, tie a knot at one end or use fray check to prevent unraveling.
- Insert the unknotted/unfinished end of the tail into the opening you left at the back of the mouse, ensuring about 1/2 to 1 inch is tucked inside.
- Pin the edges of the opening together, sandwiching the tail securely in place.
- Using a ladder stitch (also called an invisible stitch) or very small, neat stitches, sew the opening closed. Pay extra attention to securing the tail firmly into the seam – this is often a point of weakness with cat toys. Double-stitch over the tail area for extra reinforcement.
Congratulations! Your sewn mouse cat toy is complete. Remember to always supervise your cat with new toys. If you're looking for more ways to keep your kitty engaged and active, check out our Cat Scratchers & Trees Collection for durable options that promote healthy scratching and climbing!
Tips for Success & Durability
Creating a handmade toy is rewarding, and with a few extra tips, you can ensure your mouse toy stands the test of time and countless pounces.
Reinforce Your Stitches
Cats are strong! Their claws and teeth can quickly unravel flimsy stitches.
- Backstitch is Your Friend: Instead of a simple running stitch, use a backstitch for all seams. This creates a much stronger, more secure seam that mimics machine stitching.
- Double Stitching: For critical areas like where the tail is attached or any high-stress points, go over the seam twice. This adds an extra layer of protection against enthusiastic play.
- Knots, Knots, Knots: Always tie off your thread with multiple secure knots, especially at the beginning and end of each seam. Consider hiding the knots inside the toy by inserting your needle a short distance from where you finished, pulling the thread through, and snipping it flush.
Choose Tough Fabrics
While soft fabrics are appealing, some are more durable than others.
- Wool Felt vs. Craft Felt: Wool felt is significantly more durable and less prone to pilling and tearing than synthetic craft felt. It's an investment that pays off in longevity.
- Denim & Canvas: Repurposed denim from old jeans or sturdy canvas scraps are excellent choices for their inherent strength.
- Layers: If using a thinner fabric, consider fusing it to a backing fabric or doubling up layers for a sturdier toy.
Make Multiples (A "Mischief" of Mice!)
Your cat will undoubtedly fall in love with their new mouse, so why not make a few?
- Variety is the Spice of Life: A small collection of handmade mice can keep playtime fresh. You can vary the colors, add different internal fillers (some with catnip, some with crinkle material).
- Backup Toys: When one mouse needs a wash or a repair, another is ready for action.
- Gifts: Handmade cat toys make wonderful gifts for fellow cat parents or donations to local animal shelters.
Regular Inspection and Maintenance
Just like any pet accessory, DIY toys need attention.
- Check for Wear: Before each play session, quickly inspect the mouse for loose threads, tears, or exposed stuffing.
- Repair or Retire: If you spot any damage, repair it immediately with strong stitches. If it's beyond repair or if small pieces are detaching, it's safer to discard the toy to prevent ingestion.
- Cleaning: Most fabric cat toys can be hand-washed with a gentle, pet-safe detergent and air-dried. This keeps them hygienic and fresh.
By following these tips, your handmade mouse cat toy won't just be a quick craft project; it will become a cherished, long-lasting part of your cat's playtime repertoire.
Beyond the Mouse: Why Play is Essential for Feline Well-being
Crafting a mouse cat toy is more than just a fun DIY project; it's an investment in your cat's overall well-being. Play isn't just about entertainment for felines; it's a fundamental aspect of their physical and mental health. At Skimys, we believe in providing products that are functional, durable, design-forward, and joyful because we understand the profound importance of enrichment in a cat's life.
Physical Health Benefits
- Exercise and Weight Management: Regular play helps cats burn calories, maintain a healthy weight, and build muscle tone. Chasing, pouncing, and batting at a mouse toy mimics hunting, providing crucial physical activity, especially for indoor cats.
- Improved Agility and Coordination: The quick movements required during play enhance a cat's reflexes, balance, and coordination.
- Healthy Joints: Consistent, low-impact activity helps keep joints flexible and reduces the risk of stiffness, particularly as cats age.
Mental Stimulation and Stress Reduction
- Combating Boredom: Cats are intelligent creatures who need mental engagement. A lack of stimulation can lead to boredom, which often manifests as destructive behaviors, excessive meowing, or even anxiety. Play provides a healthy outlet for their energy and curiosity.
- Satisfying Natural Instincts: The hunting sequence—stalk, pounce, capture—is deeply ingrained in a cat's DNA. Mouse toys, especially those that can be made to dart and hide, offer a safe and appropriate way to express these natural predatory behaviors. This helps prevent them from "hunting" furniture or your ankles!
- Reducing Anxiety and Stress: Play can be a fantastic stress reliever. When cats are engaged in play, their focus shifts, and they can release pent-up energy and tension in a positive way.
Strengthening Your Bond
- Interactive Play: While a handmade mouse can be a great solo toy, it also offers opportunities for interactive play with you. Wiggling it under a blanket or dangling it can spark their interest, creating joyful bonding moments.
- Positive Association: Shared playtime builds trust and positive associations between you and your cat, reinforcing your relationship.
Incorporating toys like your handmade mouse, alongside our curated selections, is key to a happy, healthy cat. After an energetic play session, your feline friend will appreciate a soft, secure spot to recharge. Give your feline the comfort they deserve—browse our Cat Beds & Furniture Collection to find the perfect spot for lounging, napping, and recharging. Every product we offer, from a cozy bed to an exciting toy, is designed with pet well-being, quality, and attention to detail in mind, ensuring a fulfilling life for your companion.
Conclusion
The journey of learning how to sew a mouse cat toy is one filled with creativity, care, and the promise of endless purrs. We've explored everything from the tangible benefits of DIY crafting, like personalization and cost-effectiveness, to the crucial importance of safety in material selection and construction. You're now equipped with a detailed, step-by-step guide to create a charming, durable mouse toy that’s tailored to your cat's unique personality and hunting instincts.
Remember, every stitch you make is an act of love, directly contributing to your cat’s physical health, mental stimulation, and overall happiness. Watching them pounce, bat, and carry their new handmade mouse will be a truly joyful and rewarding experience that strengthens the special bond you share. This hands-on approach perfectly complements our mission at Skimys: to make life with pets easier, cleaner, and way more fun, by offering products that are functional, durable, design-forward, and joyful. We believe in providing solutions that make every day with your feline companion better.
Whether you're making a single mouse or an entire "mischief" of them, the effort you put in will undoubtedly be appreciated by your beloved feline. And while we encourage these wonderful DIY projects, we also invite you to discover the playful, high-quality options we've meticulously tested and curated. Ready to make every day fun for your feline, or perhaps add a few more playtime essentials to their collection? Shop our Cat Toys Collection now and find the perfect blend of handmade charm and Skimys quality to keep your cat engaged, active, and utterly delighted!
FAQ Section
Q1: What kind of fabric is best for a DIY mouse cat toy?
A1: Durable, natural fabrics are ideal. Wool felt or wool-blend felt are excellent choices as they don't fray easily and are sturdy. Sturdy cotton, fleece, or repurposed denim from old jeans also work well. Always ensure the fabric is clean and free of harsh chemicals or strong detergents that might deter your cat or cause irritation.
Q2: Is catnip necessary for the toy?
A2: No, catnip is not necessary, but it can certainly enhance the toy's appeal for many cats! About 70% of cats respond to catnip, experiencing a burst of playful energy or relaxed contentment. If your cat isn't affected by catnip, or if you prefer not to use it, you can simply stuff the mouse with polyester fiberfill or add other stimulating elements like crinkly cellophane.
Q3: How can I make the mouse toy extra durable?
A3: Durability starts with strong materials and robust stitching.
- Fabric: Choose tough fabrics like wool felt or denim.
- Thread: Use sturdy embroidery floss (multiple strands) or strong polyester thread.
- Stitches: Employ a backstitch for all seams, and consider double-stitching in high-stress areas, especially where the tail is attached. Securely knot your thread at the beginning and end of each seam.
- Stuffing: Avoid overstuffing, as this can put undue stress on the seams.
Q4: Can I machine wash my handmade cat toy?
A4: Most handmade fabric cat toys can be gently machine washed on a delicate cycle with cold water, or hand-washed. It's best to use a mild, pet-safe detergent and then air dry the toy completely to prevent mildew. If the toy contains catnip, be aware that repeated washing may diminish its potency over time. Always inspect the toy for damage after washing and before giving it back to your cat.
Q5: What if my cat tries to eat parts of the toy?
A5: This is a critical safety concern. Always supervise your cat during playtime, especially with new toys. If your cat frequently tries to chew off and ingest parts of toys (like tails or ears), it's best to remove those elements entirely or construct the toy from a single, very sturdy piece of fabric without small appendages. Regularly inspect the toy for any signs of wear, tears, or loose threads, and repair or discard it immediately if damaged. Your cat's safety is paramount!
Q6: Can I use different shapes besides a mouse?
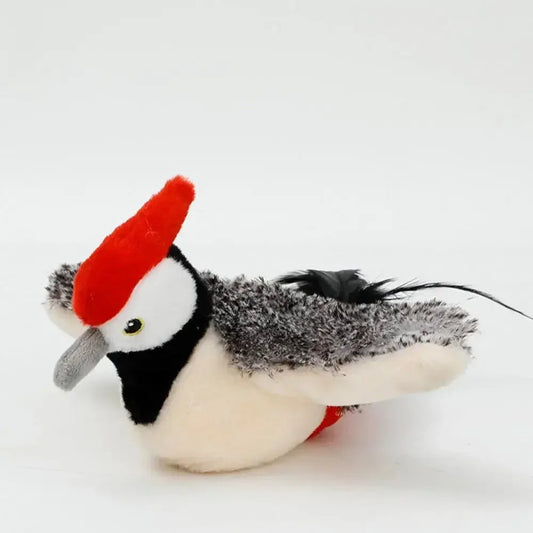
A6: Absolutely! Once you're comfortable with the basic sewing techniques, you can experiment with other cat-friendly shapes like fish, birds, or simple geometric forms. The principles of secure stitching, safe materials, and appropriate sizing remain the same. The key is to create something that encourages your cat's natural instincts, whether it’s pouncing, batting, or carrying. For more ideas on how to keep your cat active and healthy, explore our Cat Scratchers & Trees Collection, perfect for satisfying climbing and scratching needs.


